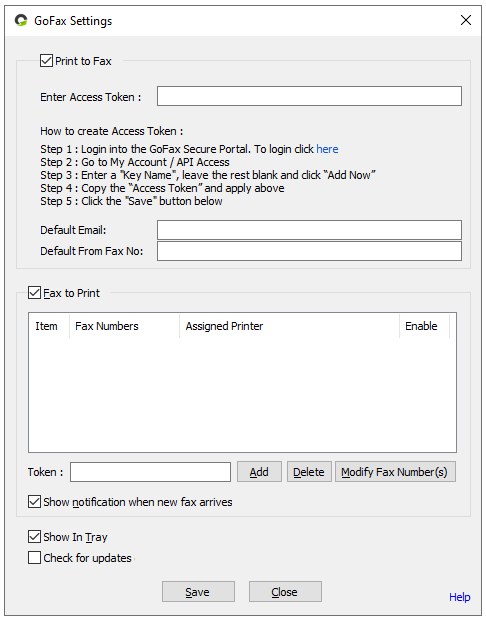
The GoFax Print Driver Fax to Print option allows you to assign a physical or virtual printer to print your received faxes, based on API Access Token. To do so, you must first install the GoFax Printer Driver Application on your computer.
- Once installed, you will need to enable the "Fax to Print" option in settings.
- Open the GoFax Print Driver from your computer
- Enter the API Access Token you have created in the "Token" field under Fax to Print (if you have not yet completed this step during the installation process) and click "add". Previously created API Access Tokens are accessible via your GoFax account
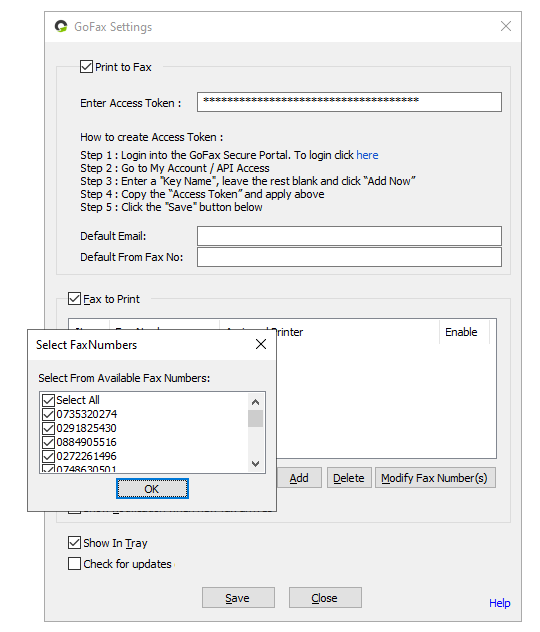
- Once added, you will be prompted with a list of fax numbers on your account. By default, all fax numbers will be selected. You have the option to:
- Select all fax numbers and assign them to the same printer, allowing all received faxes to be automatically printed via one device.
- Assign individual fax numbers to different printers, allowing received faxes to be printed via separate devices.
- Once configured successfully, any received faxes will automatically print to the selected printer. You will receive a notification for any incoming faxes that are setup to be automatically printed. Eg:
 Assigning multiple access tokens, fax numbers and printers:
When setting up the Fax to Print function, you have the ability to add multiple API Access Tokens and assign different fax numbers to separate printers. You can also use the same API Access Token to assign different fax numbers to separate printers.
- Enter the API Access Token into the "Token" field under "Fax to Print" and click "Add"
- Choose a single fax number, or multiple
- Assign a printer to the chosen fax number/s and click "Save"
- These steps can be repeated as many times as required
Modifying fax numbers and printers:
Once a Fax to Print item has been added, it can easily be modified as per your requirements.
- Select the desired item from the list and click "Modify Fax Number(s)"
- From here you can select/unselect fax number/s and change print destinations.
- You have the option to enable or disable items by selecting or deselecting the check box "Enable" next to the desired item.
- Click "Save" after you have made any desired modifications.
Note: if your API Access Token has only one fax number, the modify option will not be accessible.
Important: Delete data must be disabled to use Fax to Print
If delete data is enabled on your fax number, the GoFax Print Driver will be unable to print any received fax documents. If you would like to use the Fax to Print function, you will first need to disable delete data via your GoFax Account.Tip: If the printer or computer is not connected to the network, documents will be sent to the print queue to be printed once the connection has been reinstated
Tip: If you wish to only print received faxes during business hours, you can configure your printer/s' available times below:
- Open printer properties and click "advanced"
- Unselect "Always available" and select "Available times"
- Choose the desired timeframe and click "Save"
Disabling the Fax to Print function:
- Uncheck the "Fax to Print" box and click "save" at any time to disable the Print to Fax function.